
Honeycomb Ornaments
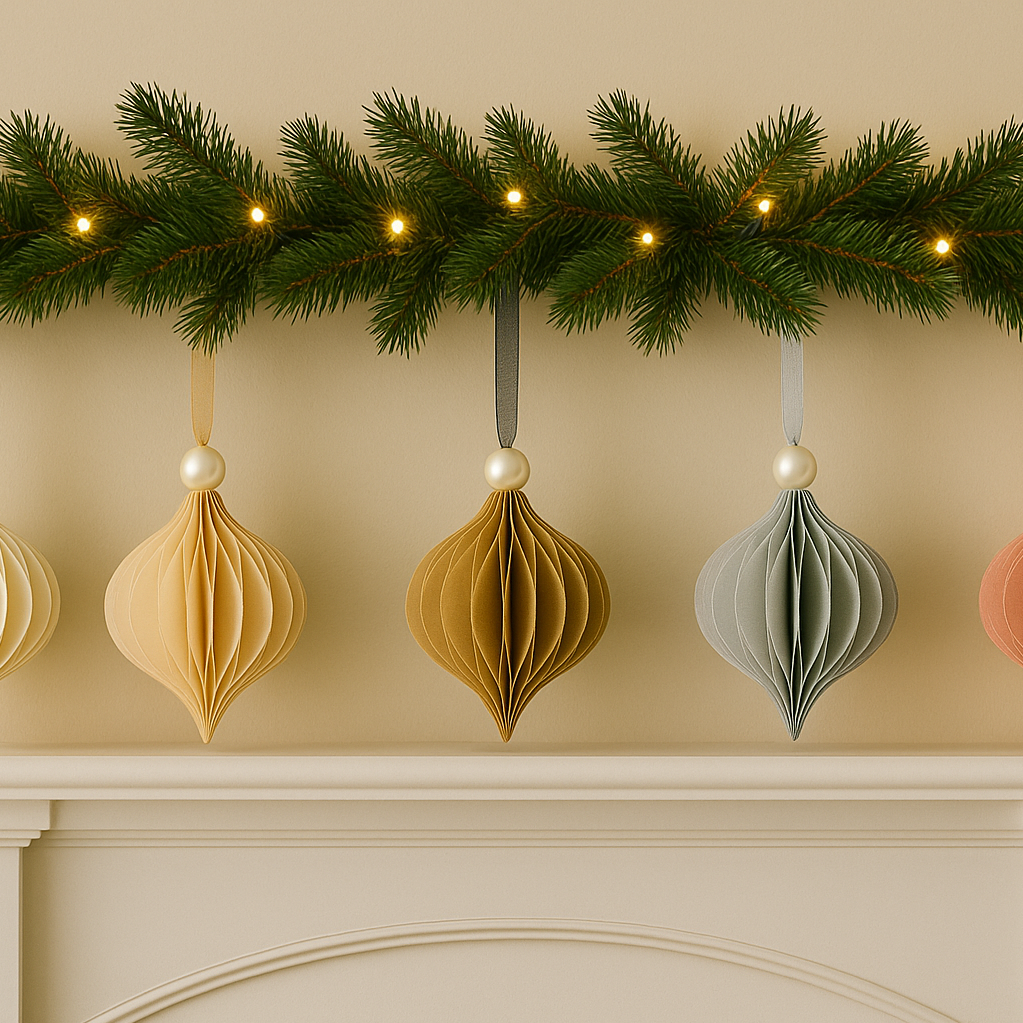
When I first stumbled across these honeycomb ornaments, I instantly fell in love with the strong geometric lines and graceful simplicity of them.
Then when I started making them - and learned all the different ways they could be customized- I became obsessed.
Below is a step-by-step guide on how to make the ornaments.
Tools
Or 1 shape cut out 20 times out of 65lb or thinner colored card stock
Glue - My favorite tacky glue.
Ribbon - I use this sheer organza.

Step 1
Fold the pieces in half. Bond Fete’s kits come with a score down the center, which you can follow.
Be sure your pieces are folded in half evenly, as an overlap will impact how smoothly your edges will be painted later.
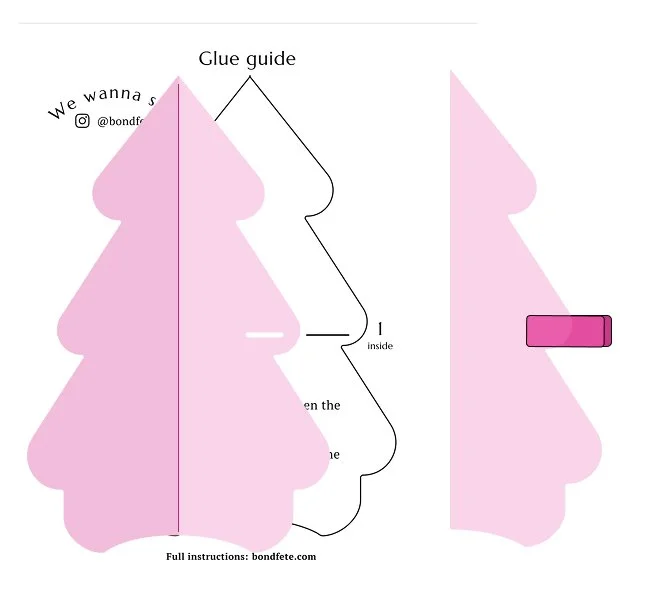
Step 2
Align your open ornament with the glue guide on the back of your kit.
Put a line of glue in line with the #1 inside mark of the guide. Leave a gap between the glue and the edge.
Fold and clip to allow the glue to dry.
Glue them all.
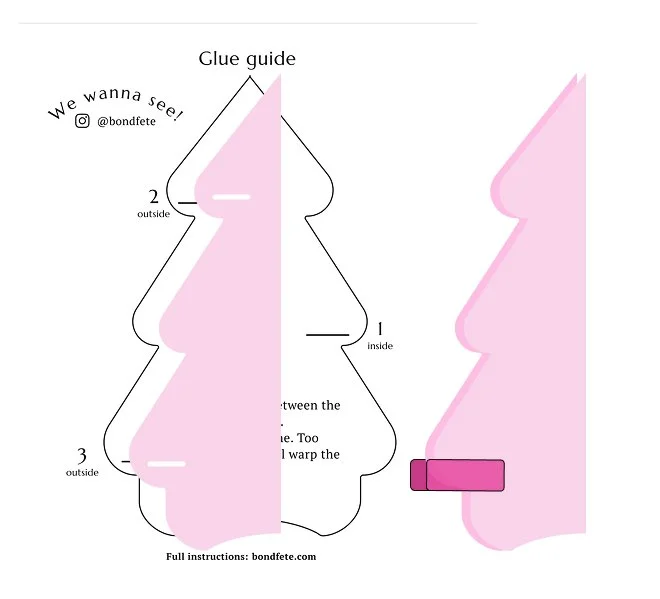
Step 3
With your individual pieces that are glued on the inside, align one with the glue guide with #2 and #3.
Put a line of glue inline with #2 and #3, leaving a gap between the glue and edge.
Stack another piece on top and press hard. Adding another 2 lines, following #2 and #3 marks on the guide- repeat until done.
Use the table to ensure all pieces are aligned with each other.

Step 4
A) Before moving to step B - open your ornament slowing, starting from one end. Fan out the ornament, looking for stuck edges and unstick them.
B)
With all your pieces glued together, use clips to hold the paper tight. Spread glue along entire seam and rub in with your finger - let dry. (This is a great time to start another ornament.)
C) Once dry, it’s time to open your ornament. Remove clips, and slowly starting from one end, fan the ornament out helping to unstick edges that were accidentally glued together.
D) To paint the edges, use clips to hold the paper tight. With a little bit of paint, stroke your brush down the edge of the ornament. Swipe the edge with a tissue using a light touch to help reduce the amount of paint used - repeat with paint and tissue. Once done, open the ornament and let it dry (it won’t take long).

Step 5
A) Cut a ribbon about ~7 inches long, and fold in half. On the glued flat end of the ornament: add more glue then layer one ribbon end, more glue, and the second ribbon end.
B) Using the glue guide, put a glue line as indicated at #2 and #3. Then open the ornament and clip the pieces together.
Allow to dry for 5-10 minutes prior to hanging.
And you’re done!!!
I’d love to see your ornament. Share or tag on instagram @bondfete. If you have any feedback, please share via the contact form.